In this blog post, I will show you how to create a table in Dynamics 365 for Finance and Operations (D365FnO) and follow the best practice guidelines.
1. Open Visual Studio and connect to your D365FnO project.
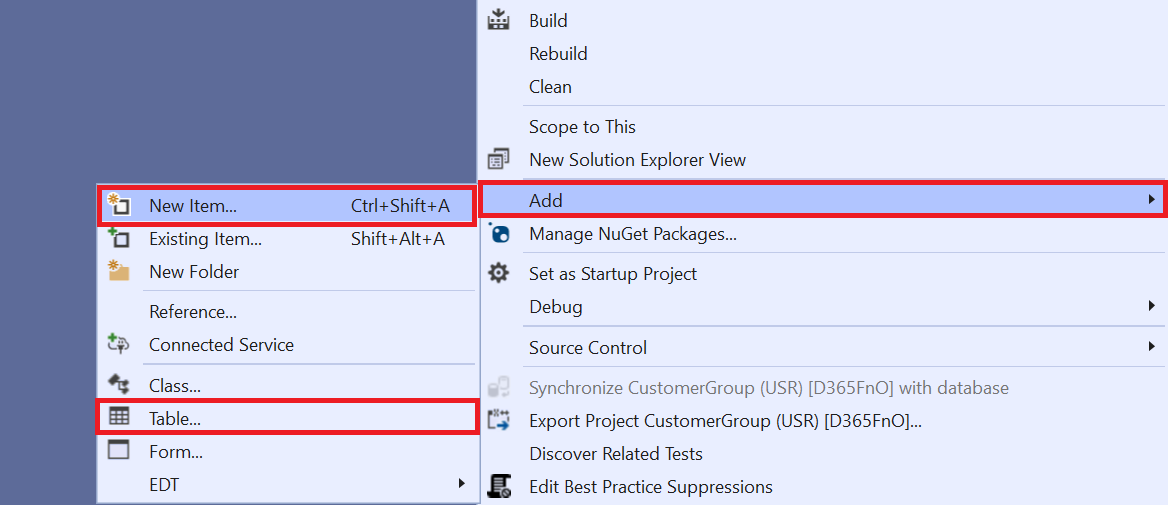
2. Right-click on your project and select Add > New Item.
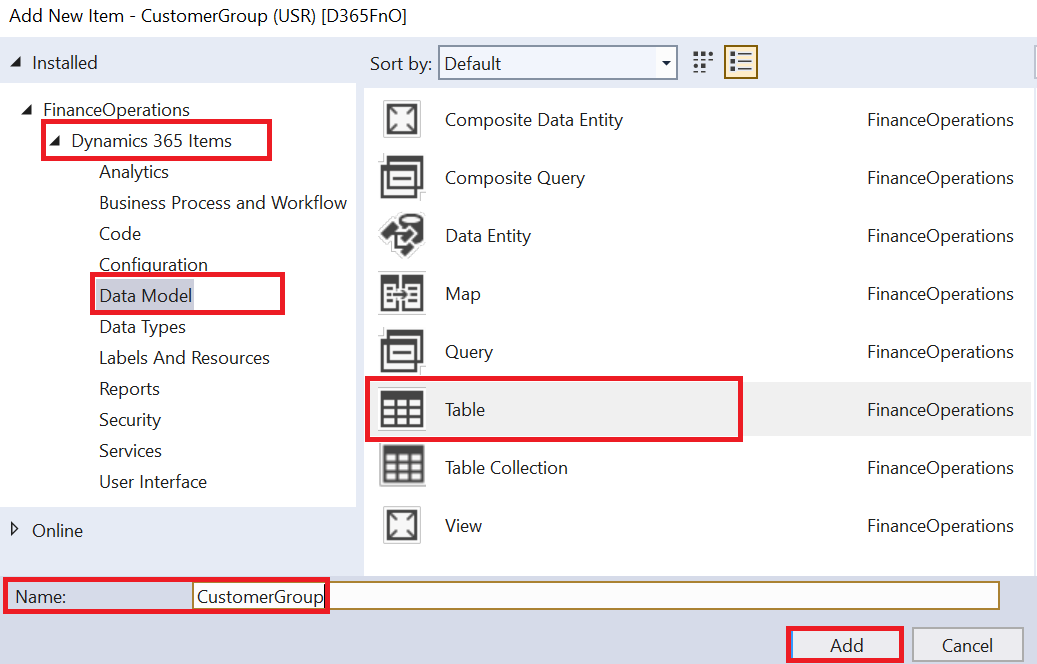
3. Select from the New Item dialog box list if exist otherwise go to New Item select Data Model > Table under Dynamics 365 Items and enter a name for your table. Click Add.
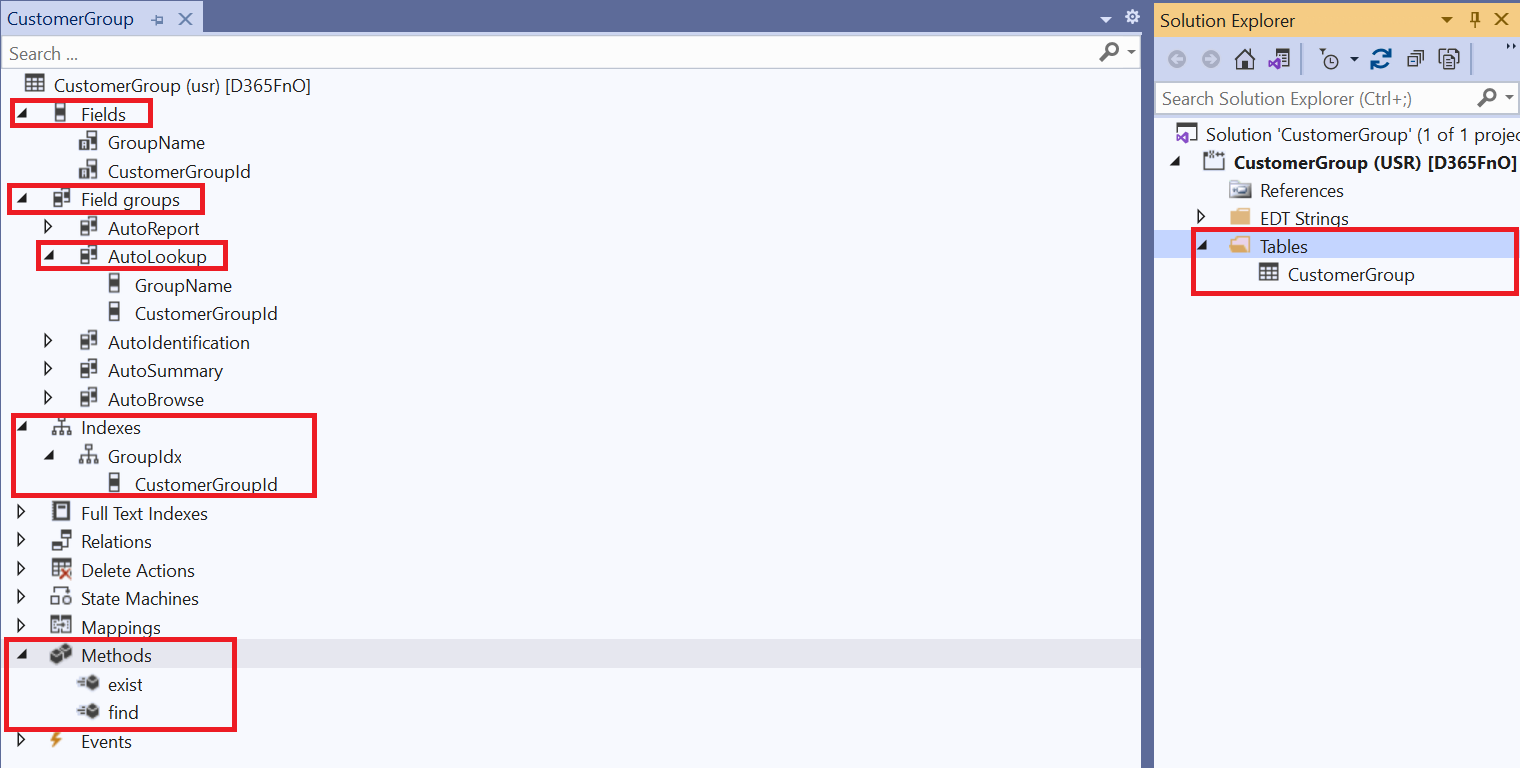
4. In Table Designer, you can define the properties and fields of your table. You can also add relations, indexes, and methods to your table.
5. To follow the best practice guidelines, you should use meaningful names for your table and fields, avoid using reserved words or prefixes, use labels for user interface texts, and follow the naming conventions for table methods, field groups, and indexes.
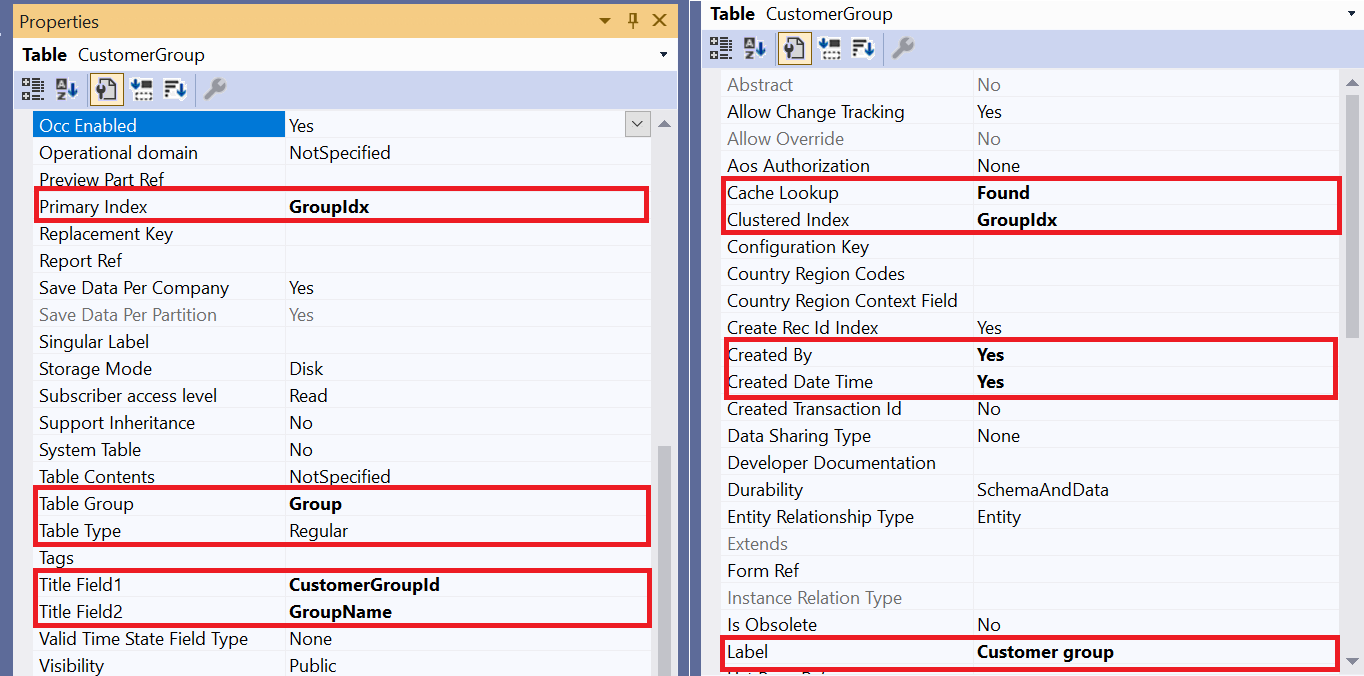
Set some important table properties.
- Label: Use labels for user interface texts.
- Cache Lookup: Found use for group tables.
- CreateBy & CreateDateTime: Keep a record of who created the record and when.
- Primary Index: Make sure for unique records.
- Clustered Index: Order of storing records physically in the database.
- Table Group: For group tables use group type.
- Table Type: Save the record in the database select Regular table type.
6. When you are done designing your table, save your changes and synchronize the database.
7. To test your table, you can use the Table Browser tool to view and edit the data in your table.
I hope this blog post was helpful for you to learn how to create a table in D365FnO and follow the best practice guidelines. Thank you for reading!


