In this blog post, I will show you how to develop custom workflow in D365FnO.
This is part-2 of my previous post on workflow development part-1.
Create Workflow Approval:
In the Solution Explorer, right-click the project and select Add > New Item > Dynamics 365 Items > Business Process and Workflow > Workflow Approval and enter the valid name for the workflow approval (SOWFApproval)
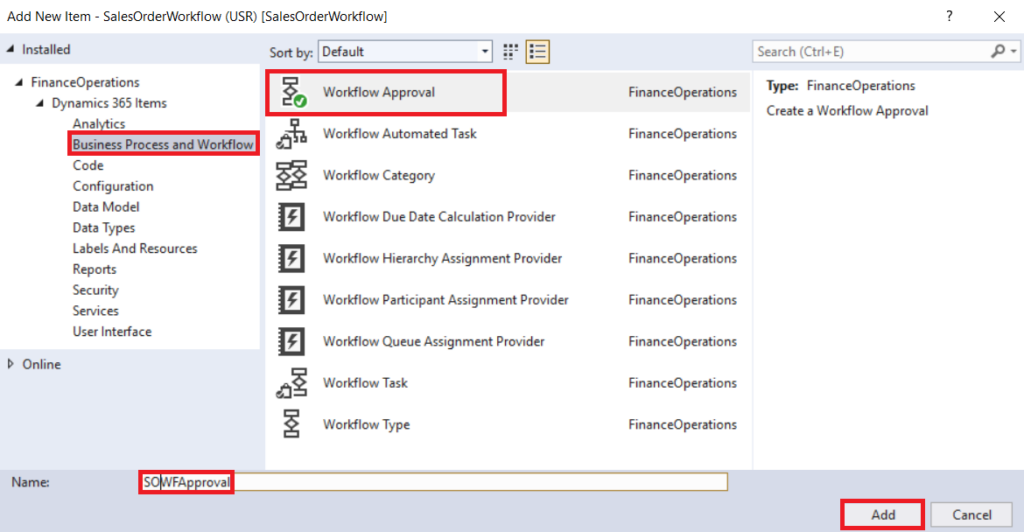
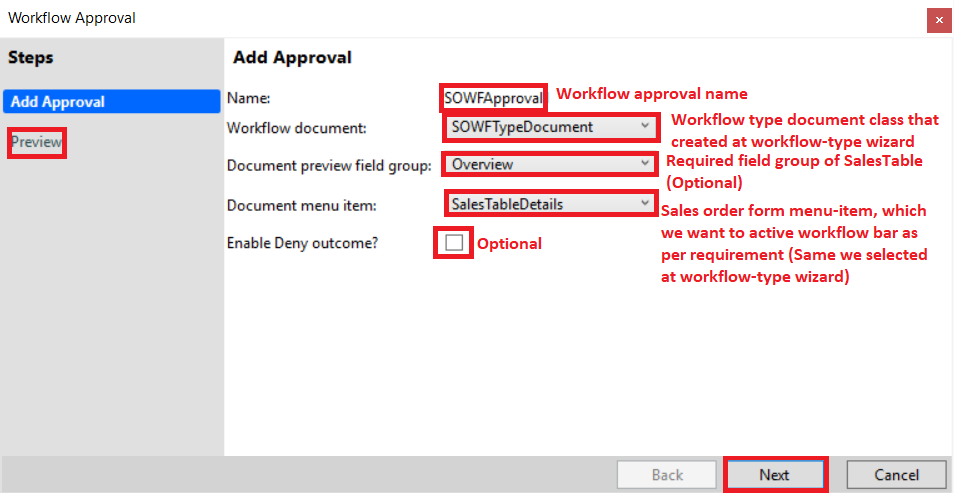
After clicking Add button you will see the below window, select the highlighted values for SOWFApproval from the drop-down in the window and press next and finish the wizard.
After finishing the workflow approval wizard below listed classes and menu items are created automatically.
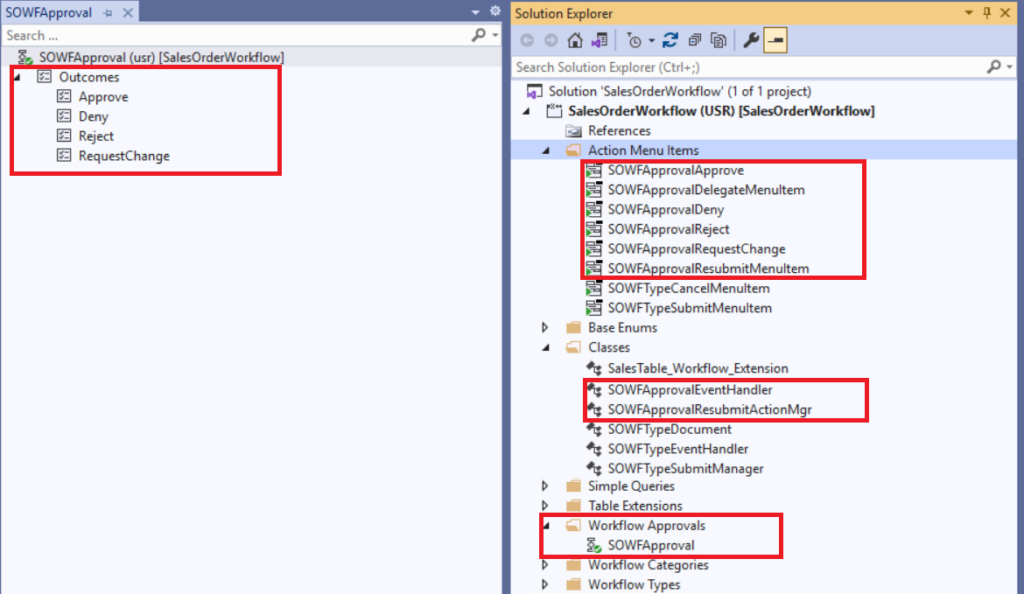
Set the Label and Help text as required from the property windows of SOWFApproval and all SOWFApproval (Approve, Delegate, Deny, Reject, RequestChange and Resubmit) action menu items.
Change in workflow approval created classes:
SOWFApprovalEventHandler class:
Open the class into the code editor copy and paste the below code into the class carefully.
Open the class into the code editor copy and paste the below code into the class carefully.
public final class SOWFApprovalEventHandler implements WorkflowElementCanceledEventHandler,
	WorkflowElemChangeRequestedEventHandler,
	WorkflowElementCompletedEventHandler,
	WorkflowElementReturnedEventHandler,
	WorkflowElementStartedEventHandler,
	WorkflowElementDeniedEventHandler,
	WorkflowWorkItemsCreatedEventHandler
{
    public void started(WorkflowElementEventArgs _workflowElementEventArgs)
	{
        SalesTable::UpdateWorkflowState(_workflowElementEventArgs.parmWorkflowContext().parmRecId(), SOWFStatus::Waiting);
	}

    public void canceled(WorkflowElementEventArgs _workflowElementEventArgs)
	{
        SalesTable::UpdateWorkflowState(_workflowElementEventArgs.parmWorkflowContext().parmRecId(), SOWFStatus::Rejected);
	}

    public void completed(WorkflowElementEventArgs _workflowElementEventArgs)
	{
        SalesTable::UpdateWorkflowState(_workflowElementEventArgs.parmWorkflowContext().parmRecId(), SOWFStatus::Approved);
	}

    public void denied(WorkflowElementEventArgs _workflowElementEventArgs)
	{
		// TODO:  Write code to execute once the workflow is denied.
	}

    public void changeRequested(WorkflowElementEventArgs _workflowElementEventArgs)
	{
        SalesTable::UpdateWorkflowState(_workflowElementEventArgs.parmWorkflowContext().parmRecId(), SOWFStatus::Revised);
	}

    public void returned(WorkflowElementEventArgs _workflowElementEventArgs)
	{
        SalesTable::UpdateWorkflowState(_workflowElementEventArgs.parmWorkflowContext().parmRecId(), SOWFStatus::Revised);
	}

    public void created(WorkflowWorkItemsEventArgs _workflowWorkItemsEventArgs)
	{
		// TODO:  Write code to execute once work items are created.
	}
}
SOWFApprovalResubmitActionMgr class:
Open the class into code editor copy and paste the below code into the class carefully.
public class SOWFApprovalResubmitActionMgr
{
    public static void main(Args args)
    {
      if(args.record().RecId == 0)
      {
          throw error(error::missingRecord(tableStr(SalesTable)));
      }

      WorkflowWorkItemActionManager::main(args);
      SalesTable::UpdateWorkflowState(args.record().RecId, SOWFStatus::Waiting);
    }
}
Add Workflow Approval to Workflow Type
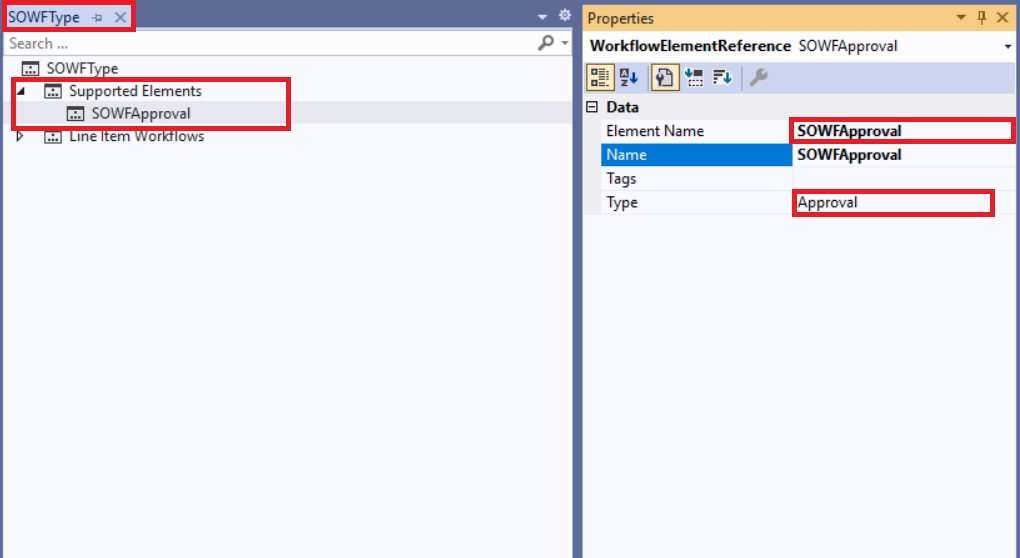
Right-click on the Supported Elements under SOWFType and add SOWFApproval as a New Workflow Element Reference. Make sure Element Name should be your workflow approval name as here SOWFApproval.
Enable Workflow on Sales order form:
Create the extension of SalesTable form and drag-drop the SOWFStatus field from the data source of the SalesTable form and set the properties as highlighted below screenshot.

Save and Build the complete project.
Configure the Workflow:
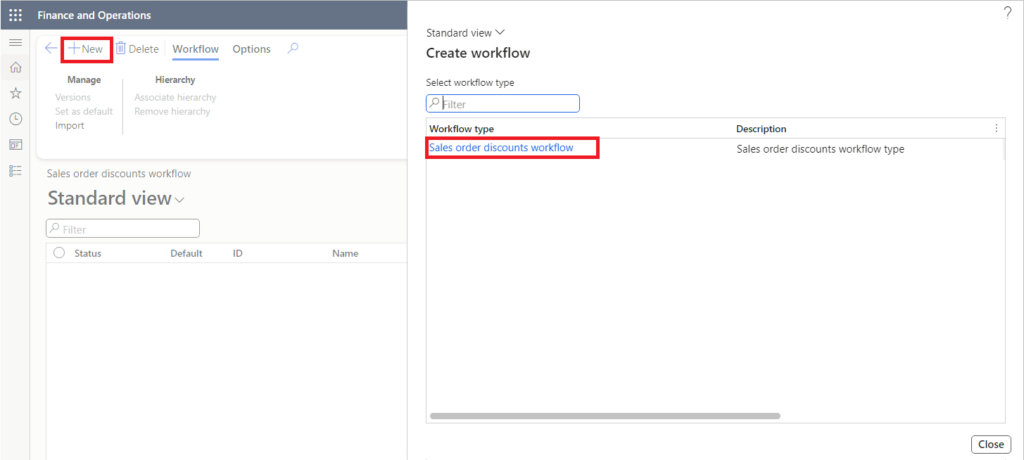
To test the workflow you need to configure the workflow from the Sales and Marketing Workflows. Go to the New button and select your workflow type.
If it’s not working in Chrome try it in Microsoft Edge browser.
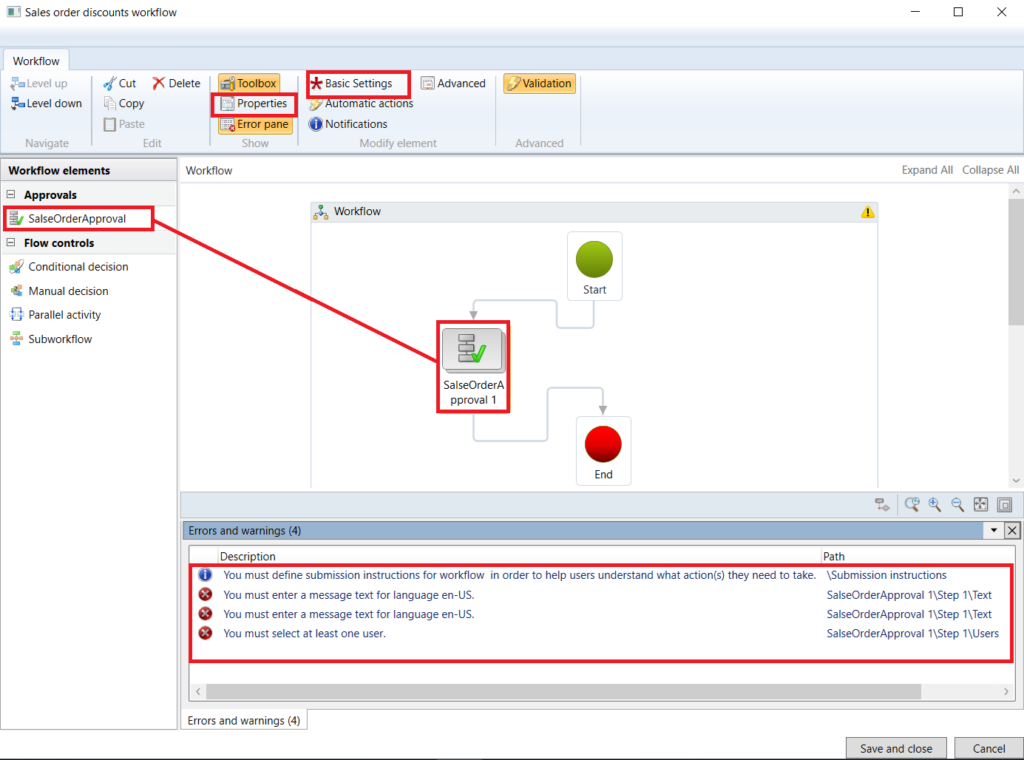
Drag-drop the SalesOrderApproval in the workflow window connect the start and end points with approval, do all the settings about the configuration, assign the user, and set the instructions and language.
Navigate to the Sales and Marketing module and open the sales order you will see the Workflow button on the Action pane.

That’s it! I hope you found this blog post useful and informative. Share with others.

