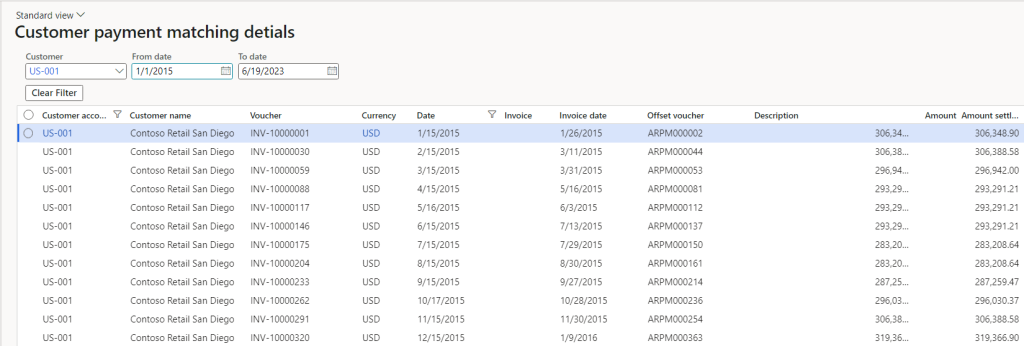
In this blog post, I will show you how to create a Inquiry using the View in D365FnO
In the previous blog post, we have discussed about View. In this post we will discuss about the Inquiry form development using View.
An inquiry form is a type of form that allows users to filter and view data from a Table, Query or View. It can also have buttons to perform actions on the records.
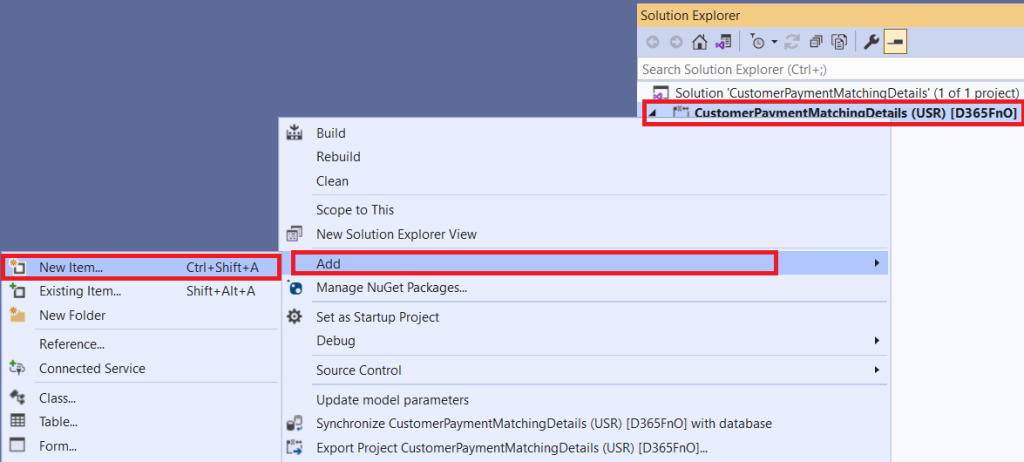
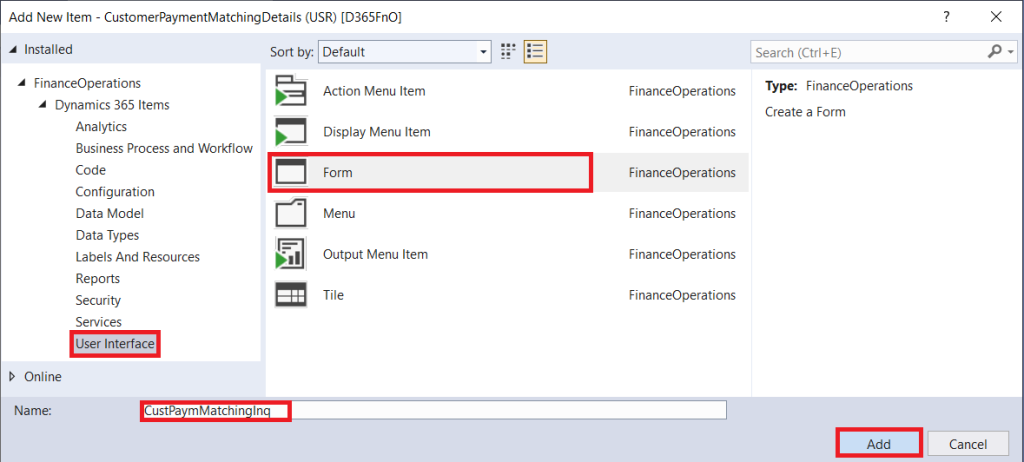
6. Set the data source for inquiry CustPaymMatchingInq in Table option, I have used View as data source. All fields are displayed under the Fields node.
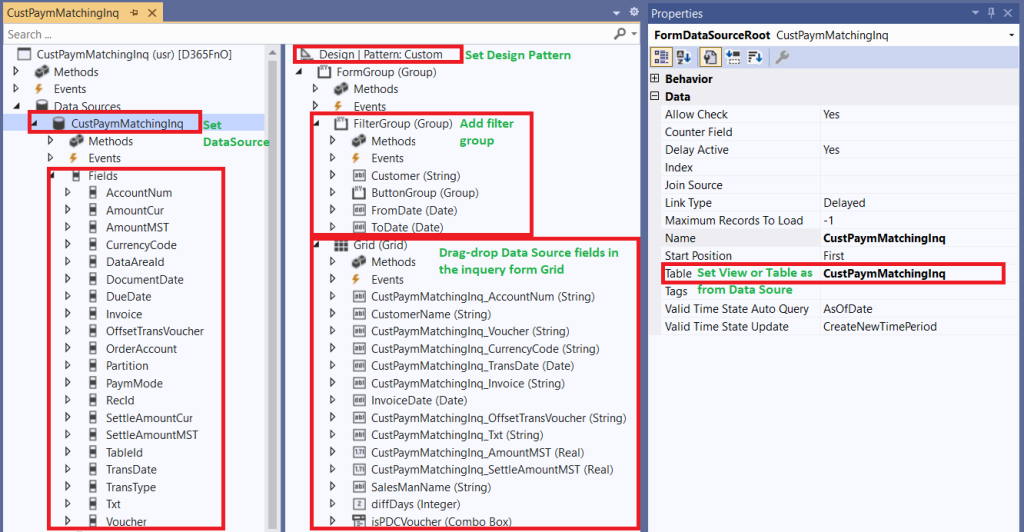
8. Under Design | Pattern: Custom Add the FormGroup under this Group add FilterGroup for filtration and Grid for display the fields on the inquiry form.
9. Select Design | Pattern: Custom node in Preview section you can see the structure of filtration and grid output.
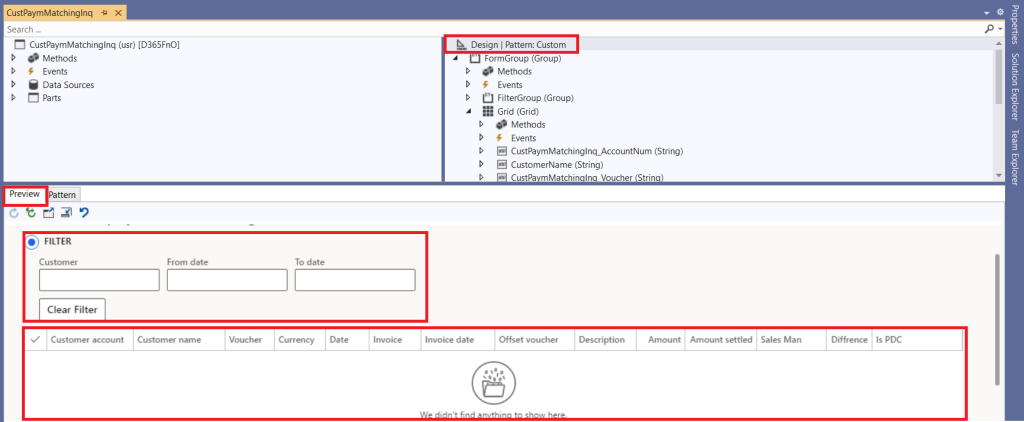
10. Save your Inquiry and Build/Rebuild the project.
[Form]
public class CustPaymMatchingInq extends FormRun
{
    // Condition for data filteration on the based of filters
    void filterData()
    {
        CustPaymMatchingInq_ds.query().dataSourceTable(tableNum(CustPaymMatchingInq)).clearRanges();
        if (Customer.valueStr())
        {
            CustPaymMatchingInq_ds.query().dataSourceTable(tableNum(CustPaymMatchingInq)).addRange(fieldNum(CustPaymMatchingInq,AccountNum)).value(Customer.valueStr());
        }
        if (FromDate.dateValue()    ||    ToDate.dateValue())
        {
            CustPaymMatchingInq_ds.query().dataSourceNo(1).addRange(fieldNum(CustPaymMatchingInq,TransDate)).value(queryRange(FromDate.dateValue(),ToDate.dateValue()));
        }
        CustPaymMatchingInq_ds.executeQuery();
    }

    // Called this method at the form initialization and set the From date & To date
    public void init()
    {
        super();
        FromDate.dateValue(dateStartYr(today())); // set current year start date as FromDate
        ToDate.dateValue(today()); // set today date as ToDate
        element.filterData();
    }

    // Override the Customer filter control level modified method and called the filterData() method
    [Control("String")]
    class Customer
    {
        public boolean modified()
        {
            boolean ret;
            ret = super();
            element.filterData();
            return ret;
        }
    }

    // Override the FromDate filter control level modified method and called the filterData() method
    [Control("Date")]
    class FromDate
    {
        public boolean modified()
        {
            boolean ret;
            ret = super();
            element.filterData();
            return ret;
        }
    }

    // Override the ToDate filter control level modified method and called the filterData() method
    [Control("Date")]
    class ToDate
    {
        public boolean modified()
        {
            boolean ret;
            ret = super();
            element.filterData();
            return ret;
        }
    }

    // Override the Clear filter button control level clicked method to clear the filters value
    [Control("Button")]
    class Clicked
    {
        public void clicked()
        {
            super();
            FromDate.dateValue(dateNull());
            ToDate.dateValue(dateNull());
            Customer.text('');
            element.filterData();
        }
    }
}
You can now test it by opening the inquiry from the display menu item. See output of inquiry form in the following screenshot.
