In this blog post, I will show you how to develop custom workflow in D365FnO.
Workflow is a term that describes the sequence of steps and actions that are performed to complete a business process. Workflow can be used to automate tasks, streamline operations, improve efficiency, and ensure compliance with rules and policies.
A custom workflow is a workflow that is tailored to the specific needs and preferences of a business or a customer. A custom workflow can be created by modifying an existing workflow template or by designing a new workflow from scratch.
In this post, I am taking a sales order document as a example for workflow development, to develop an custom workflow on sales order need to follow these steps:
1. Open Visual Studio and connect to your development environment (Model).
2. In the Solution Explorer, right-click the project and select Add > New Item.
3. In the Add New Item dialog box, select Dynamics 365 Items > Data Types > Base Enum and enter a name for the base-enum (SOWFStatus).
4. Click Add to create the Base Enum for workflow status.
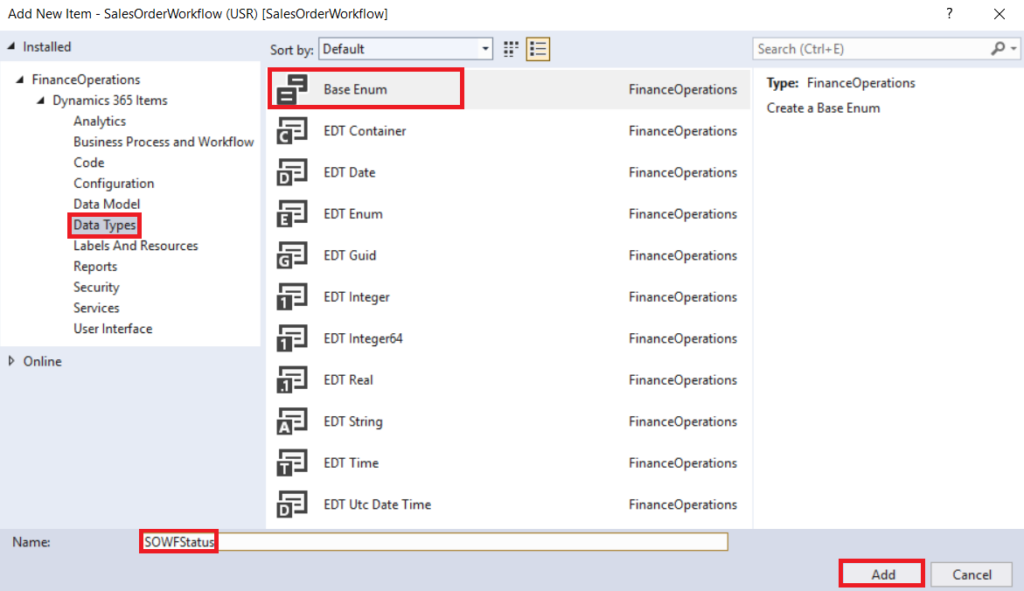
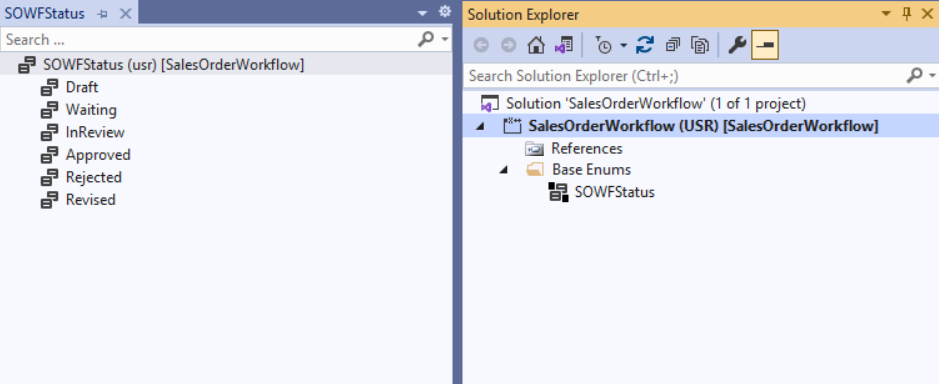
5. In the Form Designer, add new elements for workflow state and set Label for each element also set the Label for SOWFStatus enum from the property.
6. Create extension of SalesTable table and drag-drop the SOWFStatus enum into the table fields.
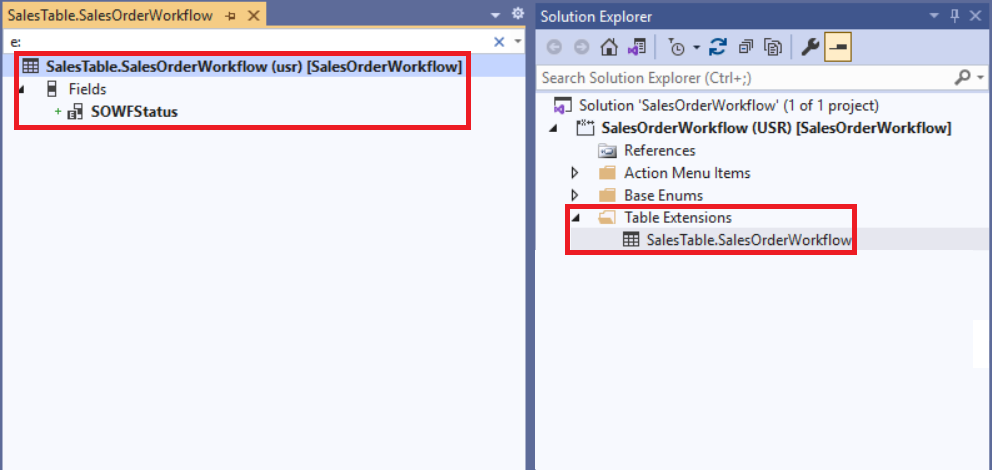
7. Save SalesTable Build and Sync the project.
Create Methods on the SalesTable:
Create the SalesTable_Workflow_Extension extension class copy & paste the below code into this class.
[ExtensionOf(tableStr(SalesTable))]
final class SalesTable_Workflow_Extension
{
    public boolean canSubmitToWorkflow(str _workflowType)
    {
        boolean     ret;
        NoYes       IsActive;

        select * from smmParametersTable;
        ret = next canSubmitToWorkflow(_workflowType);

        if(this.recID && this.SOWFStatus == SOWFStatus::Draft)
        {
            ret = true;
        }
        return ret;
    }
    public static void UpdateWorkflowState(RefRecId _recId, SOWFStatus   _status)
    {
        SalesTable salesTable;
        salesTable = SalesTable::findRecId(_recId, true);

        salesTable.SOWFStatus = _status;
        ttsbegin;
        salesTable.update();
        ttscommit;
    }
}
Create a new Query:
Create the SOWFQuery using SalesTable and SalesLine tables as a data source. We will use this Query latter in different places.
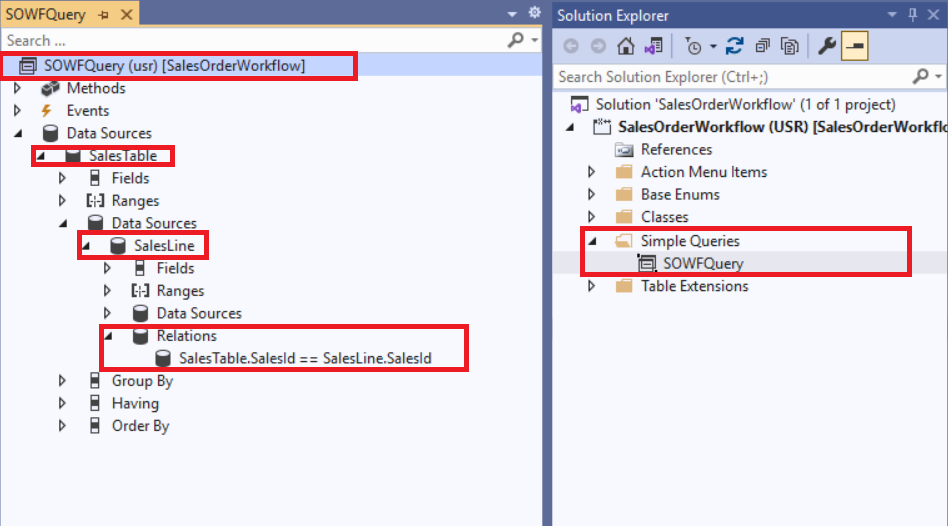
You can also read my detail blog on AOT static query. How to create a static query using multiple tables.
Create Workflow Category:
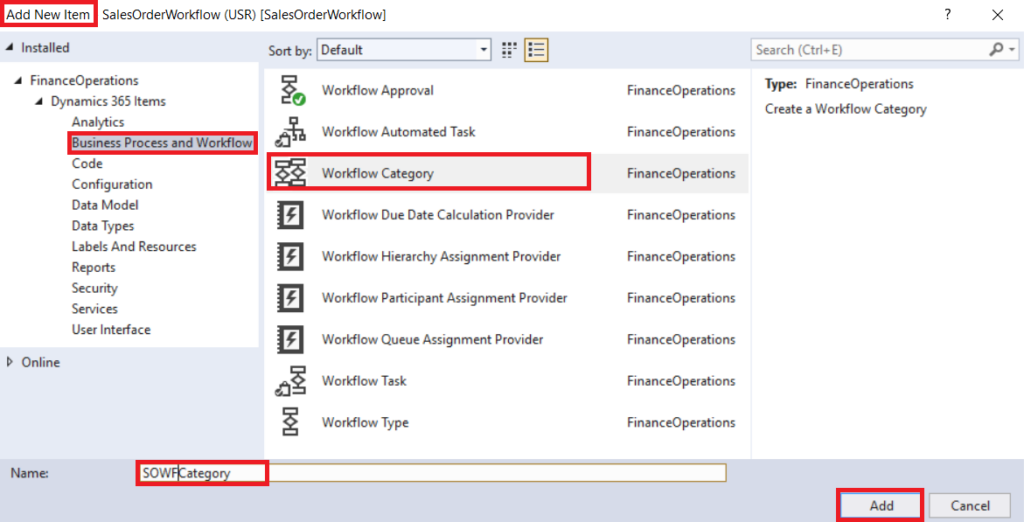
In the Solution Explorer, right-click the project and select Add > New Item > Dynamics 365 Items > Business process and Workflow > Workflow Category and enter the valid name for workflow category (SOWFCategory).
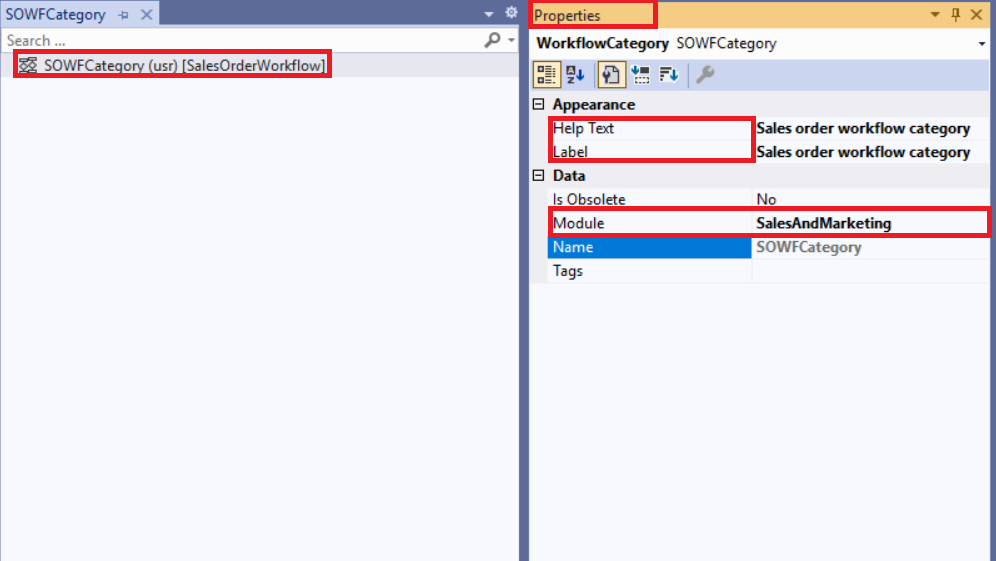
Set the below highlight properties of SOWFCategory category in the property window.
Create Workflow Type:
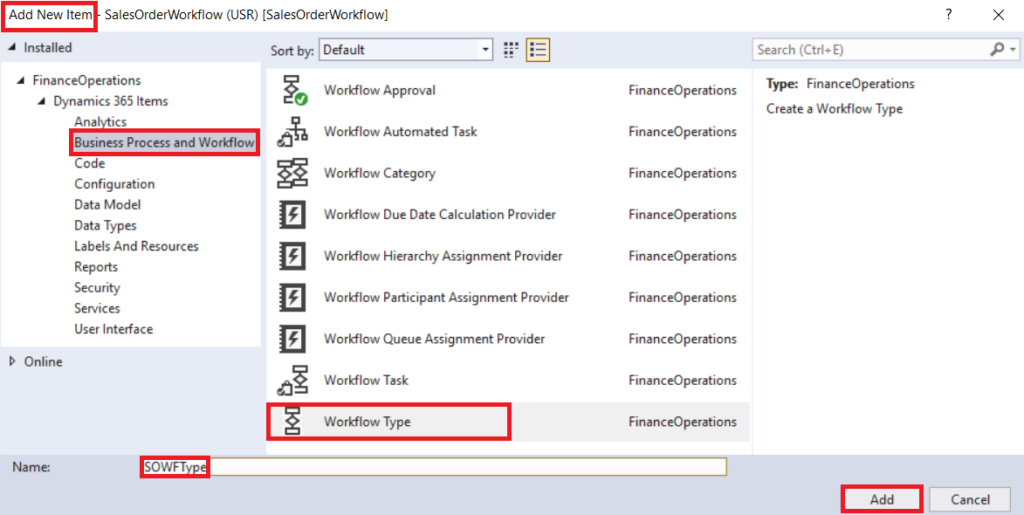
In the Solution Explorer, right-click the project and select Add > New Item > Dynamics 365 Items > Business process and Workflow > Workflow Type and enter the valid name for workflow type (SOWFType).
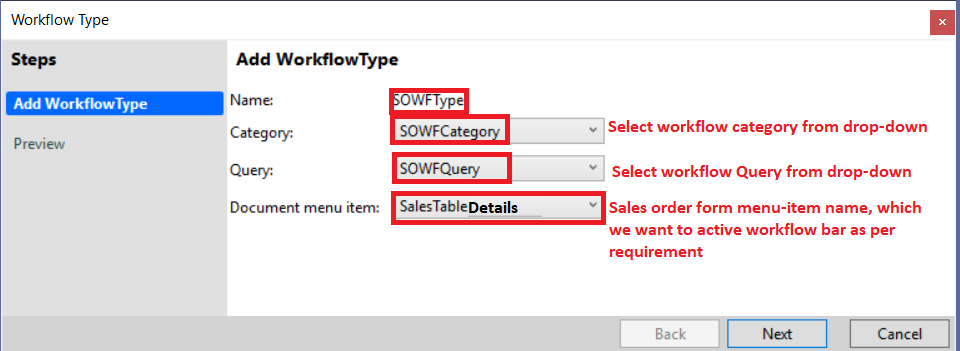
After click Add button you will see the below window, select the highlighted values for SOWFType from the drop-down in the window and press next and finished the wizard.
After finished the workflow type wizard below listed classes and menu-items created automatically.
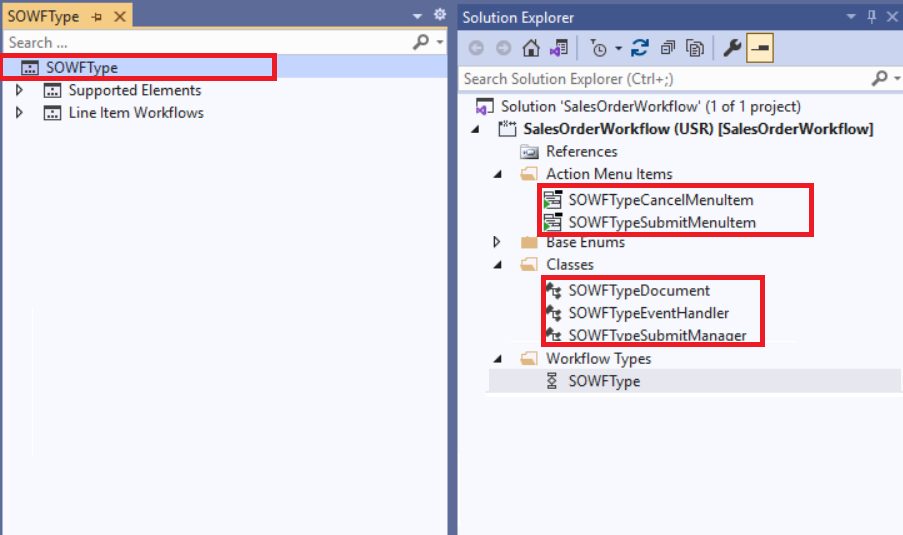
Set the Label and Help text as required from the property windows of SOWFType, SOWFTypeCancelMenuItem and SOWFTypeSubmitMenuItem.
Change in created workflow type classes:
SOWFTypeDocument class:
Leave the SOWFTypeDocument class as it is.
SOWFEventHandler class:
Open the class into code editor copy and paste the below methods into the class carefully.
public class  SOWFTypeEventHandler implements WorkflowCanceledEventHandler,
	WorkflowCompletedEventHandler,
	WorkflowStartedEventHandler
{
    public void started(WorkflowEventArgs _workflowEventArgs)
	{
        SalesTable::UpdateWorkflowState(_workflowEventArgs.parmWorkflowContext().parmRecId(), SOWFStatus::Waiting);
	}

    public void canceled(WorkflowEventArgs _workflowEventArgs)
	{
        SalesTable::UpdateWorkflowState(_workflowEventArgs.parmWorkflowContext().parmRecId(), SOWFStatus::Rejected);
	}

    public void completed(WorkflowEventArgs _workflowEventArgs)
	{
        SalesTable::UpdateWorkflowState(_workflowEventArgs.parmWorkflowContext().parmRecId(), SOWFStatus::Approved);
	}
}
SOWFTypeSubmitManager class:
Open the class into code editor copy and paste the below code into the class carefully.
public class SOWFTypeSubmitManager
{
    public static void main(Args _args)
	{
        SOWFTypeSubmitManager		    submitManger = new SOWFTypeSubmitManager();
        submitManger.Submit(_args);
	}
    private void Submit(Args _args)
    {
        SalesTable             salesTable;
        recId _recId =         _args.record().RecId;
        WorkflowCorrelationId  _workflowCorrelationId;
        workflowTypeName       _workflowTypeName = workFlowTypeStr("SOWFType");
        WorkflowComment	       note = "";
        WorkflowSubmitDialog   workflowSubmitDialog;
        FormRun formRun        = _args.caller();
        FormDataSource         fds;
        workflowSubmitDialog = WorkflowSubmitDialog::construct(_args.caller().getActiveWorkflowConfiguration());
        workflowSubmitDialog.run();
        if (workflowSubmitDialog.parmIsClosedOK())
        {
            salesTable = _args.record();
            note = workflowSubmitDialog.parmWorkflowComment();
            try
            {
                _workflowCorrelationId = Workflow::activateFromWorkflowType(_workflowTypeName, salesTable.RecId, note, NoYes::No);
                SalesTable::UpdateWorkflowState(salesTable.RecId, SOWFStatus::Waiting);
                info("Submitted to workflow.");
            }
            catch (Exception::Error)
            {
                error("Error on workflow activation.");
            }
        }
        _args.caller().updateWorkFlowControls();
    }
}
This is part-1 for custom workflow development from scratch in D365FnO in the next part we will discuss the remaining development.
